Rugby How to: 2v1
Combining my passions for rugby and infographic filmmaking, I developed this self-initiated animation to educate young players on executing effective 2v1 scenarios. As a coach for my son's under-9 rugby team, I created this visual tool to demonstrate how manipulating defenders can create space for teammates. The animation employs match cuts with high-influence keyframes to deliver a dynamic and engaging learning experience.
UV Unwrapping in Cinema 4D
To bring the 3D characters to life, I needed to create detailed, textured surfaces that matched the stylized design. This required UV unwrapping, which is a crucial step in texturing 3D models accurately.
UV unwrapping is the process of flattening a 3D model into a 2D map, allowing textures and artwork to be applied precisely. Think of it like unfolding a cardboard box into a single sheet before decorating it.
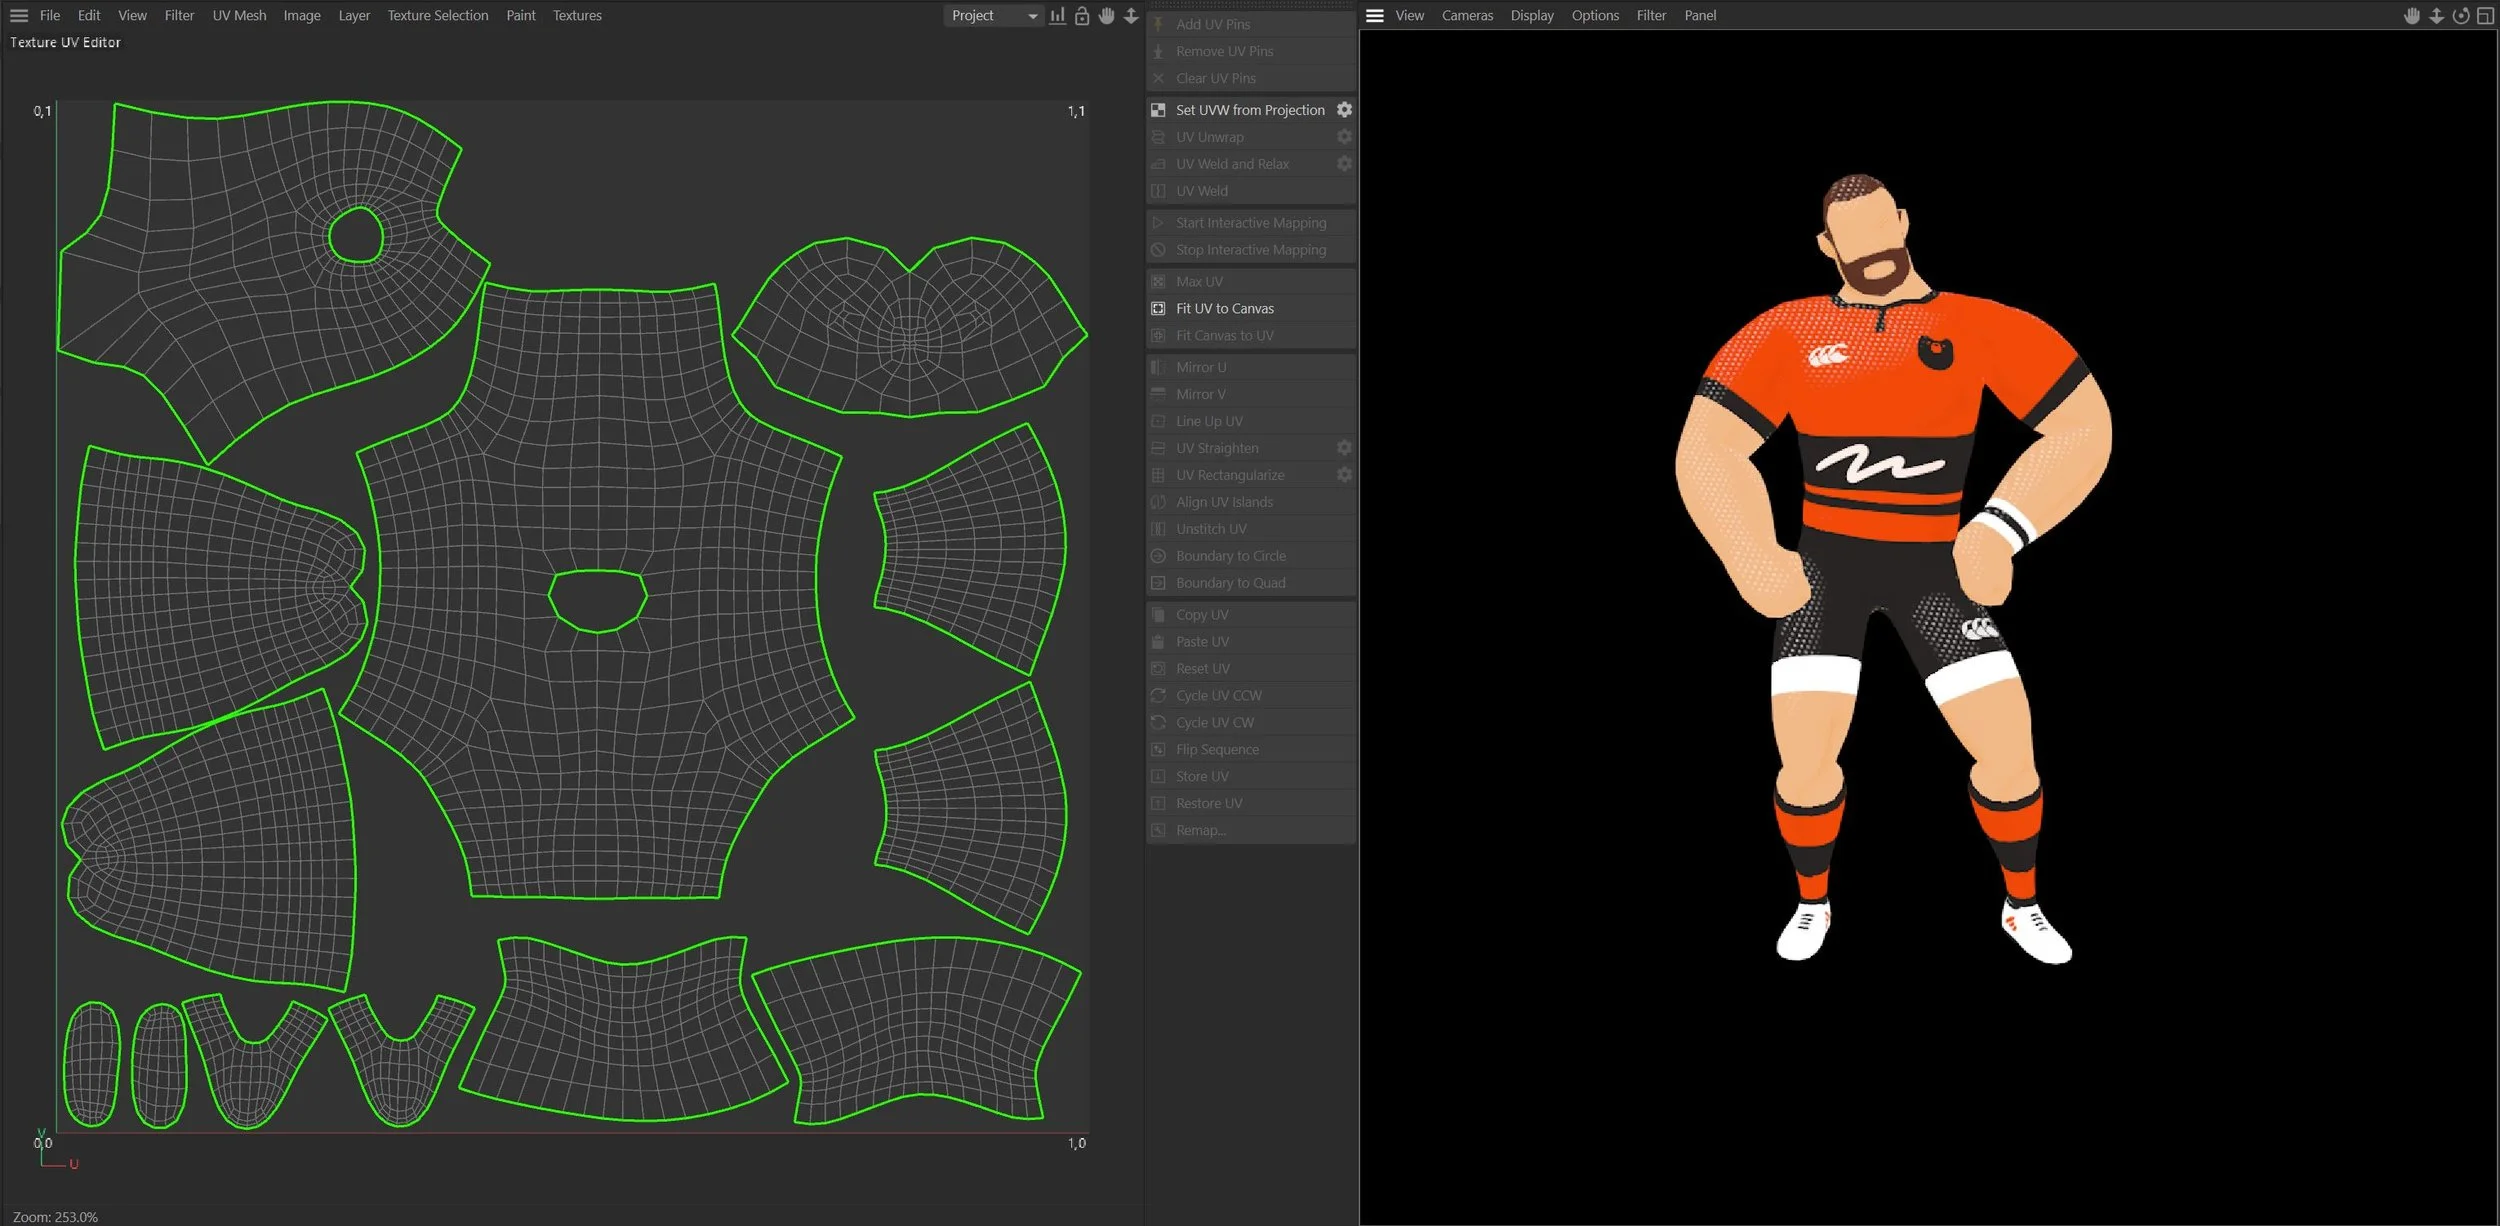
Here’s how you do it in Cinema 4d.
✅ Step 1: Unwrapped the character model’s mesh (above) to create a seamless texture layout.
✅ Step 2: Used UV mapping tools in Cinema 4D to prevent stretching and distortion.
✅ Step 3: Applied textures in Photoshop directly onto the unwrapped 2D map to ensure clean and crisp surface details.
✅ Step 4: Rewrapped the UV map back onto the 3D model, making sure colours and patterns aligned correctly.